 Loading... Please wait...
- Home
- Beeswax Recipes
Beeswax Recipes
Waxing Cheese Using Beeswax
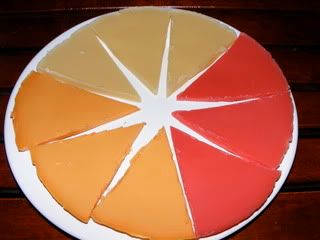
In the days prior to refrigeration, cheese was stored in either its own rind that formed or it was brushed or dipped in melted wax. This method is still used today by artisanal cheese makers, commercial cheese makers and hobbyists. This method can also be used to put store bought cheese in long term storage.
It is important to note that unlike commercially available cheese waxes that contain paraffin (a petroleum product) beeswax is more brittle and can lead to cracking when used in its pure form. This problem can be alleviated by blending the beeswax with a vegetable based oil. I found the following recipe:
CHEESE WAX (Ounces by weight):
16 ounces beeswax
3 ounces vegetable shortening
I have also seen mineral oil used as an adjunct.
Further instruction on cheese waxing and using store bought cheese:
Organic Surfboard Wax Recipe
A simple organic surfboard wax can be made with 2 or 3 natural ingredients, depending upon the recipe.
Recipe 1: Warm water
Beeswax
Coconut oil- found at most supermarkets
As with most beeswax recipes you will need a double boiler, a simple pot inside of a pot partially filled with water will suffice. Beeswax and coconut oil are flammable and direct heat should be avoided, not to mention high heat will impart a burnt smell to the mixture.
Add 4 parts beeswax to one part coconut oil and warm on medium heat until all solids are melted. Pour into a muffin tin or other container that will serve as a mold. Enclose in plastic wrap or a container and store in a cool dry place.
Recipe 2: Cold water
Beeswax
Coconut oil
Tree resin (also goes by pine resin, rosin, colophony)
It can be found on Ebay and around the web. It can even be collected if you are adventurous.
Use the double boiler as mentioned above, but this time slowly melt 3 parts beeswax 1 part coconut oil and 1 part tree resin. Pour the liquid into a mold and allow to set up.
Note on both recipes, if you don't get the consistency you desire, simply remelt the surfboard wax and add slightly more beeswax(beeswax/tree resin) for a harder tackier consistency or add slightly more coconut oil for a smoother consistency.
Moustache Wax Recipes
Moustache Wax
In valuable for an unruly moustache, moustache wax will tame the rowdiest of whiskers. Recipes for homemade wax can be very basic to more involved.
The simplest is equal parts beeswax and petroleum jelly. Just gently melt in a double boiler, it can also be done in a microwave, just be careful to not overheat.
For a stiffer wax use 60% beeswax and 40% petroleum jelly.
For more recipes and tips on using moustache wax:
http://www.handlebarclub.co.uk/waxindex.shtml
Melt and Pour Beeswax Soap
Beeswax Soap
4 oz unscented, clear glycerin soap
1 tsp grated beeswax
About 10 drops of fragrance/essential oil
1-2 drops food coloring (optional)
Best done in a double boiler to ensure even heating. Melt the soap until liquid. Grate beeswax and add to te melted soap. No need for heating much above 145 degrees. Too hot and the beeswax and fragrance can "burn off". Now add the fragrance and food coloring. Stir thoroughly. Pour into a mold and let it set overnight.
Food Safe Beeswax Polish for Wood Bowls and Cutting Boards
This simple recipe will keep your wood wares seasoned with food safe ingredients. Perfect for wooden cutting boards, wooden salad bowls and utensils.
4 ounces pure beeswax
16 ounces food grade mineral oil, found at most drug stores
Process in a double boiler to insure gentle heating. Melt beeswax, then add mineral oil while stirring slowly. After mixing pour the mixture into a widemouthed container that will be easy to get a rag into. After it turns solid it is ready to use. Apply to your wooden wares with a smooth rag like a tee-shirt.
Homemade Lip Balm Recipe
We recommend that you use a double boiler, even just putting your pot in a pyrex baking dish with water in the bottom will prevent the fire hazard as well as keeping your beeswax and oils from browning from too much heat.
If your beeswax is too hard, soften it in a bowl of hot tap water for about 10 minutes and it will be ready to grate.
Find beeswax here
Lip balm tubes here
Simple Beeswax Salve With Coconut Oil
I've seen similar recipes with olive oil, but like the properties of coconut oil better, especially the scent.
1 Use a double boiler to gently melt 2 ounces of beeswax. An ounce by weight roughly melts to a fluid ounce.
2 remove from heat and add 14-16 ounces of extra virgin coconut oil. Blend thoroughly.
3 Add and essential oil of your choice, roughly 30 drops of lemongrass, peppermint etc., whatever you choose.
4 Pour into a container that you can easily access the salve. It will solidify in to a nice thick creamy mixture.
5 You're ready to use as you choose.
Beeswax Pomade
This is a popular use for beeswax. This is a straight forward low cost recipe to make your own at home. Also use the link below to find more DIY recipes for beeswax.
1 Decide what are you going to use it for what style.
2 Depending on what you will use it for will give you a general idea of the measurement of the ingredients.
3 If you want more hold give it more bees wax than petroleum jelly or oil.
4 First melt your bees wax in a clean pan until its a liquid, then pour into a cooling container.
5 Add oil or Vaseline so the wax doesn't go hard again.
6 Remember more oil or petroleum jelly: less hold, but more shine.
7 If you like, add some mint or some kind of nice-smelling oils to cover up the smell of the petroleum jelly.
Tips
Make it in large batches because if you're a greaser, you will use a lot.
For it to wash out, use detergent, (like for your dishes.)
I personally prefer to use corn starch and shampoo because it's better for your hair.
Warnings
You are handling hot wax, be careful!.
Don't use paraffin wax or any artificial waxes instead of bees wax.
Don't melt it in a microwave, only on a hotplate or stove.
Never put pomade in your eyes or in your mouth.
Keep away from kids.
Use only cooking oils like olive or vegtable never use motor oil.
Use only natural scented oils or edible oils for your pomade.
Things you'll need
a kitchen
a pan a skillet
a stirring spoon
oven mitts
a container
bees wax
oil or petroleum jelly
scented oils (needed if you want it to smell good)
For this and other beeswax recipes wikihow has plenty.
Homemade Non-Petroleum Jelly
Ingredients
Modeling Beeswax, Play Doh Alternative
Here is a natural alternative for a child's play toy or just keeping the young ones occupied.
Modeling Beeswax Recipe
4 ounces of beeswax
1 teaspoon Lanolin
1 Tablespoon Olive Oil
A few minutes playing with this in the dry winter months could help with dry hands too.
Full directions can be found here
Traditional Hand Dipped Candle Making
This is quite an operation that relies on very little electricity. This is probably a very similar method of how candles were made for centuries in cities and towns.
Basic Beeswax Lotion
Basic Beeswax Lotion
Use a double boiler for even heating and mixing.
1 c. olive oil
1/2 c. coconut oil
1/2 c. beeswax pastilles or 2 oz solid beeswax
1/2 t. Vitamin E oil (or about 5 capsules cut open and squeezed out) (optional)
20 drops (approximately) essential oil (optional)
In the days prior to refrigeration, cheese was stored in either its own rind that formed or it was brushed or dipped in melted wax. This method is still used today by artisanal cheese makers, commercial cheese makers and hobbyists. This method can also be used to put store bought cheese in long term storage.
It is important to note that unlike commercially available cheese waxes that contain paraffin (a petroleum product) beeswax is more brittle and can lead to cracking when used in its pure form. This problem can be alleviated by blending the beeswax with a vegetable based oil. I found the following recipe:
CHEESE WAX (Ounces by weight):
16 ounces beeswax
3 ounces vegetable shortening
I have also seen mineral oil used as an adjunct.
Further instruction on cheese waxing and using store bought cheese:
Organic Surfboard Wax Recipe
Recipe 1: Warm water
Beeswax
Coconut oil- found at most supermarkets
As with most beeswax recipes you will need a double boiler, a simple pot inside of a pot partially filled with water will suffice. Beeswax and coconut oil are flammable and direct heat should be avoided, not to mention high heat will impart a burnt smell to the mixture.
Add 4 parts beeswax to one part coconut oil and warm on medium heat until all solids are melted. Pour into a muffin tin or other container that will serve as a mold. Enclose in plastic wrap or a container and store in a cool dry place.
Recipe 2: Cold water
Beeswax
Coconut oil
Tree resin (also goes by pine resin, rosin, colophony)
 |
| Tree resin |
It can be found on Ebay and around the web. It can even be collected if you are adventurous.
Use the double boiler as mentioned above, but this time slowly melt 3 parts beeswax 1 part coconut oil and 1 part tree resin. Pour the liquid into a mold and allow to set up.
Note on both recipes, if you don't get the consistency you desire, simply remelt the surfboard wax and add slightly more beeswax(beeswax/tree resin) for a harder tackier consistency or add slightly more coconut oil for a smoother consistency.
Moustache Wax Recipes
Moustache Wax
In valuable for an unruly moustache, moustache wax will tame the rowdiest of whiskers. Recipes for homemade wax can be very basic to more involved.
The simplest is equal parts beeswax and petroleum jelly. Just gently melt in a double boiler, it can also be done in a microwave, just be careful to not overheat.
For a stiffer wax use 60% beeswax and 40% petroleum jelly.
For more recipes and tips on using moustache wax:
http://www.handlebarclub.co.uk/waxindex.shtml
Melt and Pour Beeswax Soap
Beeswax Soap
4 oz unscented, clear glycerin soap
1 tsp grated beeswax
About 10 drops of fragrance/essential oil
1-2 drops food coloring (optional)
Best done in a double boiler to ensure even heating. Melt the soap until liquid. Grate beeswax and add to te melted soap. No need for heating much above 145 degrees. Too hot and the beeswax and fragrance can "burn off". Now add the fragrance and food coloring. Stir thoroughly. Pour into a mold and let it set overnight.
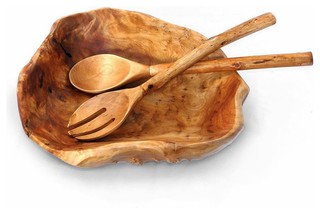
Food Safe Beeswax Polish for Wood Bowls and Cutting Boards
This simple recipe will keep your wood wares seasoned with food safe ingredients. Perfect for wooden cutting boards, wooden salad bowls and utensils.
4 ounces pure beeswax
16 ounces food grade mineral oil, found at most drug stores
Process in a double boiler to insure gentle heating. Melt beeswax, then add mineral oil while stirring slowly. After mixing pour the mixture into a widemouthed container that will be easy to get a rag into. After it turns solid it is ready to use. Apply to your wooden wares with a smooth rag like a tee-shirt.
Homemade Lip Balm Recipe
We recommend that you use a double boiler, even just putting your pot in a pyrex baking dish with water in the bottom will prevent the fire hazard as well as keeping your beeswax and oils from browning from too much heat.
If your beeswax is too hard, soften it in a bowl of hot tap water for about 10 minutes and it will be ready to grate.
Find beeswax here
Lip balm tubes here
Simple Beeswax Salve With Coconut Oil
I've seen similar recipes with olive oil, but like the properties of coconut oil better, especially the scent.
1 Use a double boiler to gently melt 2 ounces of beeswax. An ounce by weight roughly melts to a fluid ounce.
2 remove from heat and add 14-16 ounces of extra virgin coconut oil. Blend thoroughly.
3 Add and essential oil of your choice, roughly 30 drops of lemongrass, peppermint etc., whatever you choose.
4 Pour into a container that you can easily access the salve. It will solidify in to a nice thick creamy mixture.
5 You're ready to use as you choose.
Beeswax Pomade
This is a popular use for beeswax. This is a straight forward low cost recipe to make your own at home. Also use the link below to find more DIY recipes for beeswax.
1 Decide what are you going to use it for what style.
2 Depending on what you will use it for will give you a general idea of the measurement of the ingredients.
3 If you want more hold give it more bees wax than petroleum jelly or oil.
4 First melt your bees wax in a clean pan until its a liquid, then pour into a cooling container.
5 Add oil or Vaseline so the wax doesn't go hard again.
6 Remember more oil or petroleum jelly: less hold, but more shine.
7 If you like, add some mint or some kind of nice-smelling oils to cover up the smell of the petroleum jelly.
Tips
Make it in large batches because if you're a greaser, you will use a lot.
For it to wash out, use detergent, (like for your dishes.)
I personally prefer to use corn starch and shampoo because it's better for your hair.
Warnings
You are handling hot wax, be careful!.
Don't use paraffin wax or any artificial waxes instead of bees wax.
Don't melt it in a microwave, only on a hotplate or stove.
Never put pomade in your eyes or in your mouth.
Keep away from kids.
Use only cooking oils like olive or vegtable never use motor oil.
Use only natural scented oils or edible oils for your pomade.
Things you'll need
a kitchen
a pan a skillet
a stirring spoon
oven mitts
a container
bees wax
oil or petroleum jelly
scented oils (needed if you want it to smell good)
For this and other beeswax recipes wikihow has plenty.
Homemade Non-Petroleum Jelly
(aka DIY “Vaseline”)
Ingredients
1/8 cup grated beeswax (about 1 ounce) I used beeswax pellets that I had ordered off Amazon awhile ago.
1/2 cup olive oil
1/2 cup olive oil
Method
Combine beeswax and oil in a small saucepan. Melt over very low heat or in the top of a double boiler. Pour into a jar to cool.
Combine beeswax and oil in a small saucepan. Melt over very low heat or in the top of a double boiler. Pour into a jar to cool.
Full directions can be found here.
Modeling Beeswax, Play Doh Alternative
Here is a natural alternative for a child's play toy or just keeping the young ones occupied.
Modeling Beeswax Recipe
4 ounces of beeswax
1 teaspoon Lanolin
1 Tablespoon Olive Oil
A few minutes playing with this in the dry winter months could help with dry hands too.
Full directions can be found here
Traditional Hand Dipped Candle Making
This is quite an operation that relies on very little electricity. This is probably a very similar method of how candles were made for centuries in cities and towns.
Basic Beeswax Lotion
Basic Beeswax Lotion
Use a double boiler for even heating and mixing.
1 c. olive oil
1/2 c. coconut oil
1/2 c. beeswax pastilles or 2 oz solid beeswax
1/2 t. Vitamin E oil (or about 5 capsules cut open and squeezed out) (optional)
20 drops (approximately) essential oil (optional)
